Climbing the Stairs
The front stairs were easily the hardest part of this renovation project. The reason they are hard is that the floor level is going up on both floors by about 1 1/4 inches -- some change in level had to happen no matter what because of the condition of the existing floors. The problem was that normally you would just rip up existing floor boards and replace them with new ones, but in our case the existing floor runs under the walls of the house and holds them up. Our only options were:
1. Remove all interior walls and the floor boards, replace floor boards, and rebuild all walls. Yeah, no.
2. Live with existing floor boards and large holes in the floors. I pondered this quite a bit for more than a decade, and the floors just were not OK. I can live with a certain amount of disarray and dented, damaged surface, but 150 year old floors that were showing their age were well due for replacement. So another nope.
3. Add a new floor on top of the existing floor. This means that the floor level changes at the top and bottom of the existing staircase, which is a huge problem for safely going up and down the stairs. But at the same time, the treads on the stairs also needed replacement, so we came up with a cunning plan to replace the treads and then adjust the height of each step to make a smoother run of stairs.
If you are wondering why we didn't just cut the existing floor off next to the walls, our house is a transitionally framed structure rather than balloon-framed, and the floor is literally holding those walls and the roof up. If we cut it off the house would collapse, so that was really not an option. As much as I considered it.
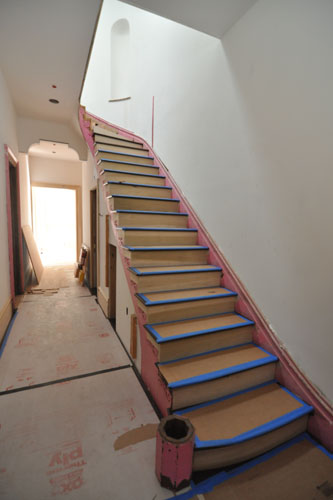
Anyway, this is where our excellent stair carpenter Juan has gotten this week.
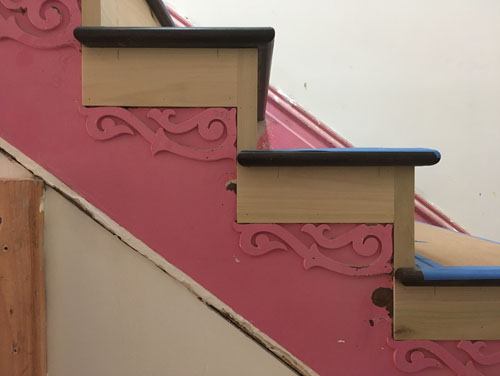
In this photo you can kind of see the subtle adjustment in the height of each step. The difference is in those pieces of new poplar, which are custom-sized for each step. There's an ogee trim that will go under the step -- it hasn't been installed yet -- that will make this look less blank.
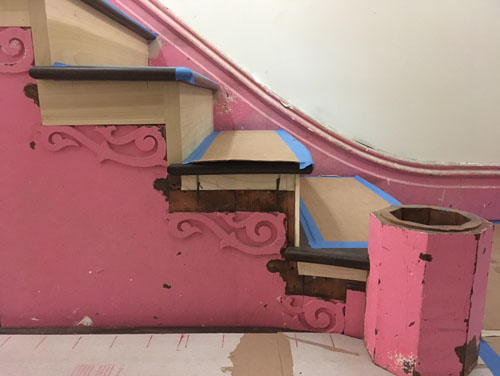
At the bottom of the stairs the side curves out to meet the newel post, and those pieces need to be site-fabricated to fit perfectly, so they are not done yet.
Also in this photo you can see that at the wall there are some spots that are grey and patchy. That is where the old treads were let into the trim, and the carpenters have been patching those up to make a smooth side trim board. In the next photo you can see one unpatched by the top step.
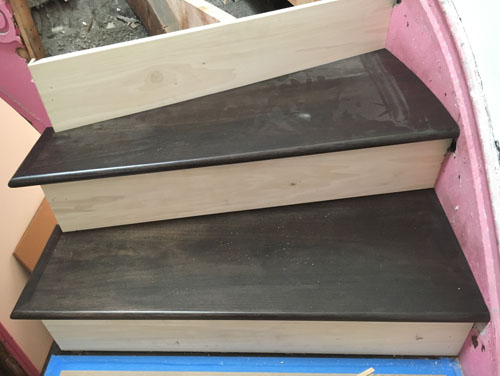
This is what the new treads look like. They are walnut, stained to match our flooring. The risers will be painted.
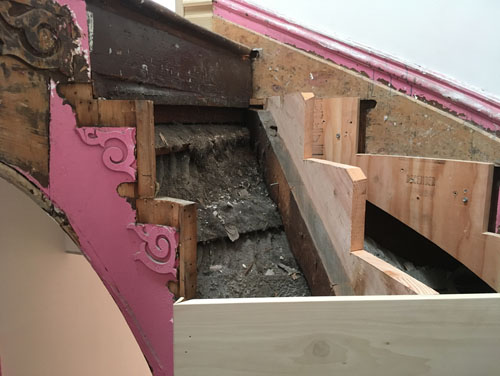
Hmm, you might think, what is all that stuff that appears to have fallen into the staircase over the years?
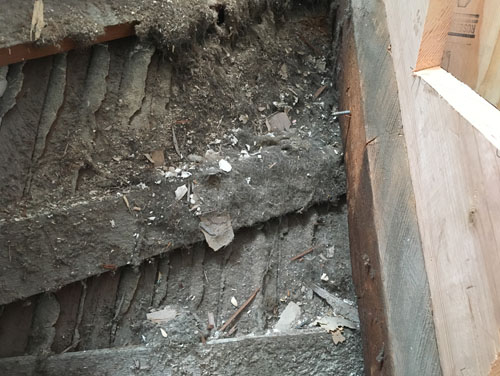
Oh, it's just dirty fur from years of Rosie shedding all over the staircase (this is what happens when you have furry dogs and elderly flooring with wide gaps between the boards: the house slowly fills up with dog fur). Maybe we should go over and vacuum that out or something.
posted by ayse on 05/07/17